How to Renew your StartSSL Client Certificate
This post should not be used as an actual implementation any longer. The mention at the end about the project that was in public beta at the time this was written, Let’s Encrypt, is now the preferred way to put your site behind a free and easily renewable SSL certificate. So please use that instead!
Historical context about how terrible it used to be to maintain free SSL certs for your site follows 😇
StartSSL offers free SSL certificates that are valid for a period of one year. There are several guides on how to renew your server’s SSL cert every year. However, something that is glossed over a little bit in these articles is that StartSSL uses S/MIME Client Certificates for authentication that also have a validity of one year, and these need to be renewed as well.[^1]
We’ll skip ahead to the steps in a little bit, but firstly, what is a client certificate? This site goes into a decent explanation of the UX problems with client certificates.
Talking of UX problems, the StartSSL procedure for renewing your client cert is pretty clunky as well. Two weeks before your client certificate expires, they send you an email about it. So when you get a mildly scary-looking mail that goes,
This mail is intended for the person who owns a digital certificate issued by the StartSSL™ Certification Authority (http://www.startssl.com/).
The Class 1, client certificate for StartCom Free Certificate Member and serial number CCAEB is about to expire in about two weeks. Please log into the StartSSL Control Panel at https://startssl.com/Certificates and get a new certificate for this purpose. Failing to update your client certificate might result in the loss of your account.
The confusing thing here is that this is also often the date of expiry for your server’s certificate, if you created your client cert and generated a server SSL cert around the same time.
So here’s what you do after getting said email:
- Go to “Certificates Wizard” and in “Select Certificate Purpose”, select “Client S/MIME and Authentication Certificate”.
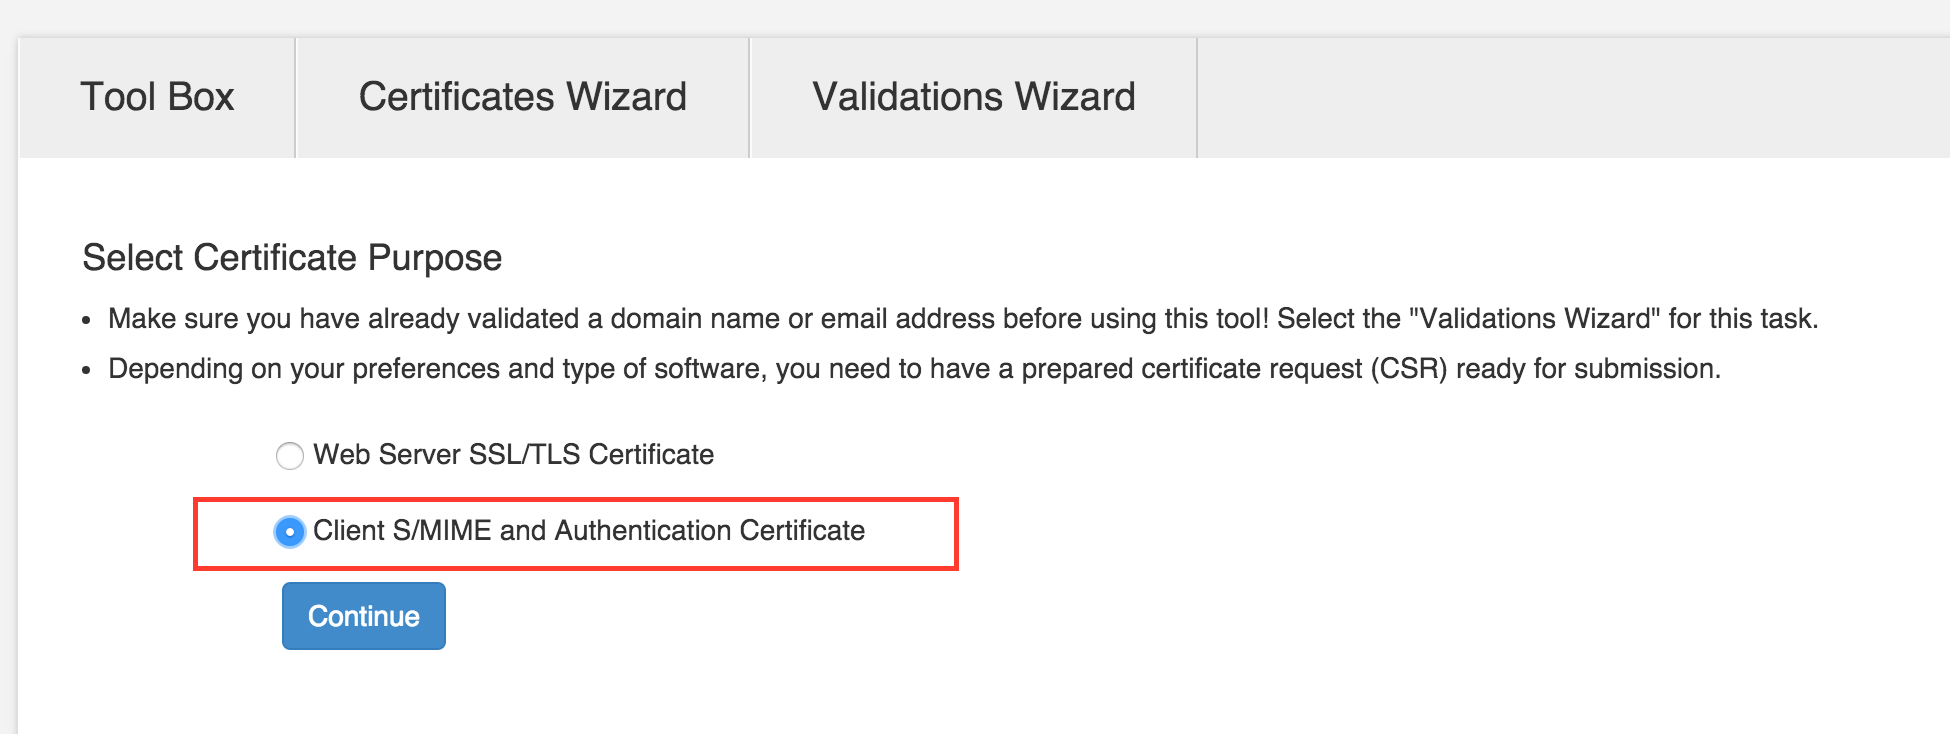
Client Certificate Selection
Aside: This is my first gripe with this workflow. It could be improved to a simple “Create New Client Authetication Certificate” button that just automatically takes you to the menu.
- To create a new Client Certificate, you have to generate a Certificate Signing Request. I don’t understand this process in depth, but basically, you give them a private key encrypted with a password and they sign it and give you a certificate. This is your client certificate - the next time you log into
startssl.com, the site looks at it and says, “Hey, we can verify that this has been signed by Mandar!”. You can generate the private key in one of two ways.From the website (this process is straightforward.)
Yourself, from the command line. Run
openssl genrsa -aes256 -out yourdomain.com.key 2048This will generate a file called
yourdomain.com.keythat is encrypted using a passphrase (which you will be prompted for). Make a Certificate Signing Request (CSR): This is the part where you tell startssl.com “Hey look, this is a cert signed by me! Validate it please!”. Again, you can do this one of two ways, corresponding to the two ways you generated the cert before.
- From the website
- Enter your email (there might be some sort of a validation process here, where they send a unique code to your email that you have to then confirm).
Select Generated by PKI System.
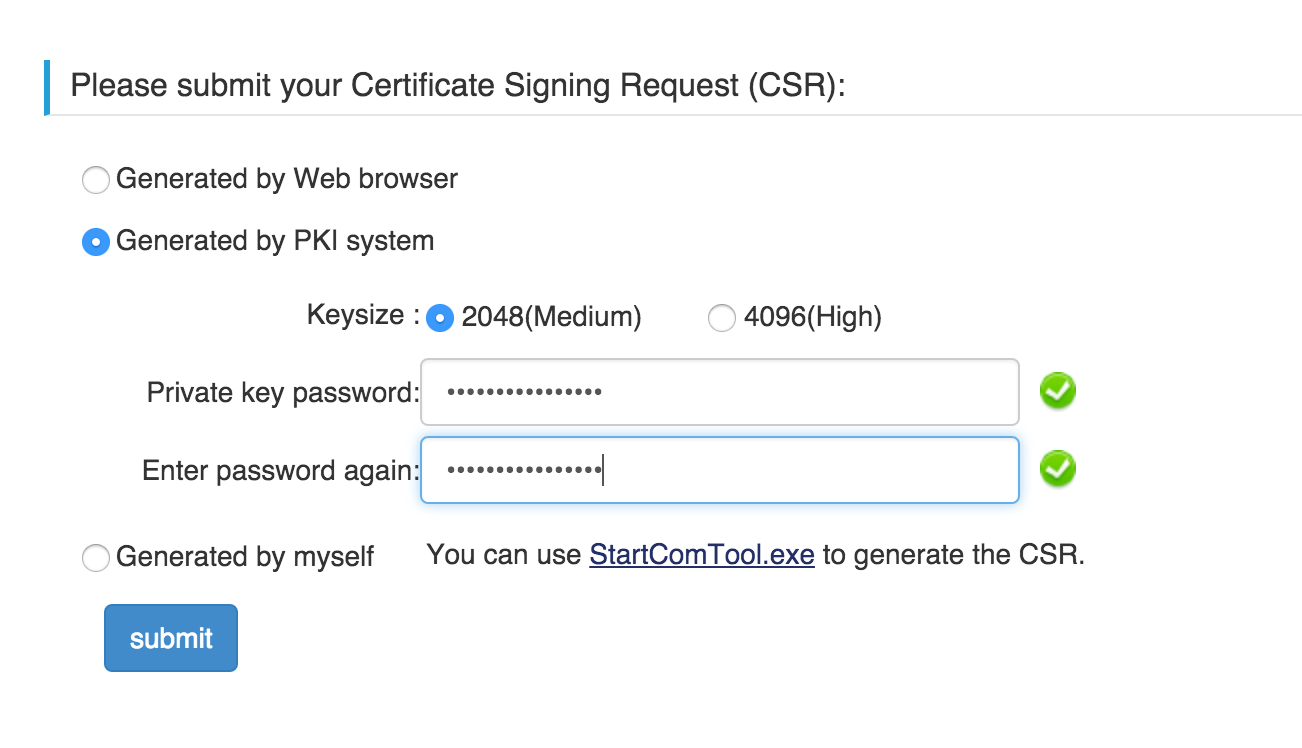
Click Submit
- Yourself, from the command line. Run
openssl req -new -sha256 -key mandarg.com.key -out mandarg.com.csrYou will receive some prompts for your Country Name, Locality, etc. – fill those in.
- From the website
Submit your CSR. If you used the website, you should be prompted to download a .key file, which is your private key. Download this, and hit “submit”. This will give you a download of two .crt files.
Generate PKCS file for export.
Again, you can do this one of two ways, corresponding to the ones mentioned in step 4.
From the website itself. If you paste in your key and CSR, the website will generate a .pfx file that you can copy to your computer. On OSX, double clicking this will add your client cert to the system Keychain.
On your own. The download in Step 4 will give you an intermediate .crt file called
1_Intermediate.crt, and a you@yourdomain.com crt file, called2_you@yourdomain.com.crt. You have to runopenssl pkcs12 -export -out newcert.pfx -inkey ssl.key -in 2_you@yourdomain.com.crt -certfile 1_Intermediate.crt
to get the the newcert.pfx file. In OSX, dragging this to your login keychain in Keychain Access will work. Ubuntu has something similar, just double clicking the .pfx file worked for me.
So there. Once you have your client certificate installed, you can then go to https://startssl.com and log in to generate a new cert for your website with a year’s validity.
[^1] I know the Let’s Encrypt project is making this process simpler. It’s in public beta now, so I’ll probably switch over at some point.
❧ Please send me your suggestions, comments, etc. at comments@mandarg.com